Each year in November we sew Christmas Pillowcases.
The girls pick the material and we sew them up for the children to have
"wonderful Christmas Dreams"
My nine year old daughter swears they work and she doesn't have a single nightmare the whole time her head is on one of these apparently! The pillowcases are much loved and this time the older two practically sewed them by themselves {yay!}
However I am starting to accumulate quite a few {almost 20 now!!}
After seeing this idea on soulemama I've started using them as gift wrapping.
I makes it all quite easy. Most toys, boxes, fit in the pillowcase and I tie it shut with a string.
Eventually I could also use them to wrap our Christmas books. 25 books each in its own bag.
And think of all the wrapping paper that will be saved over the years. The planet thanks you.
I pick them back up after Christmas and store them with the Christmas boxes ready for next year.
But onto a Tutorial on how to make your own christmas pillow case in the case you would like
your own Christmas Dreams...
Need:
just under 1 metre of christmas material per pillowcase
Sewing machine and cotton
Use an existing pillowcase to use as a guide. I folded my material in half and then laid the pillowcase on top. I then cut around the pillowcase {leaving 2cm border for sewing} and having a 15cm extra on the top {which will be the 'flap' that keeps the pillow inside}
After cutting around the guide pillowcase you will now have two pieces of material. I trim one so it is shorter than the other. The longer piece forms the flap.
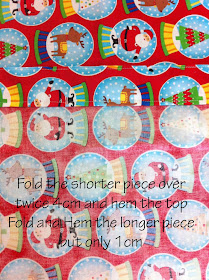
Hem the top of shorter piece with a fat hem {around 4-5 cm}
Hem the top of the longer piece with a small hem {around 1cm}
I hem by just folding the material over twice to capture the raw edges.
So now you will have two pieces of fabric that have only the top {short edge} hemmed.
Place material pieces together right sides facing inwards
Then fold the longer piece over the shorter piece so its like an envelope
Then zig zag around the same three sides to prevent fraying.
If you have an overlocker... do it in that!!
And now you are done and you turn the pillowcase back right sides out!!
Beautiful!!
Your first pillowcase will probably take a little while to work out...
but once you've done it a few times you can make these things in 10 mins!
very easy to sew and satisfying to make.
and soon enough you'll have a big pile like me.
and lots of wonderful Christmas Dreams.......
now I think I need to make me one to rest my head on!


No comments:
Post a Comment
talk talk talk... leave me some talk!