Friday, June 26, 2015

Art Party


So this year was the year I said no one was having a birthday party and could choose a fun place to go as a family instead. First child obeyed but well as the ideas got crazier and wilder, and then - how about I bring this friend or that friend or two, or as well as the family outing - we will do this too, add in visits to restaurants, but what about the pool party, can I do both? , but we've had a party (of some sort) every year, the begging and cajoling got too complicated so I caved and said it will be easier (and cheaper) for everyone to  have a party! You can have a party! And You can have a party....

So here we are...


Miss G is an art and craft freak so I thought an art party would be a good idea.
There are so many ideas out there, and she had a few ideas of her own, but we went easy.

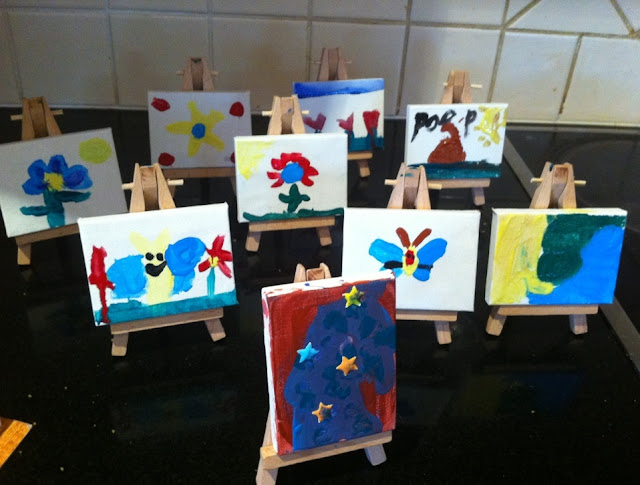
I bought 10 kids an art book, letter of their name and mini easel.
We painted and decorated, opened presents, ate, decorated a paper bag to put it all in. Done.


The cake was so easy and I was happy with how it turned out.
Pretty, quick and easy. My favourite combination!
I didn't forsee the fight over who got to eat the slices with the colour blobs though. Kids!!

 
The finished products.


I had lots of ideas for fancy foods but when the birthday girl said she wanted calippo iceblocks and chips and drinks I thought I'm insane for trying to talk her out of it.
She wants calippo's? Give em I say. Sooo easy!! 
I gave up on fancy food and attempting pinterest perfect parties a while ago.
I did throw in some nuggets cause I felt bad.

 
We painted this sign from an idea on pinterest though.
Wasn't as good as the pinned one but effective nonetheless.
 
 
Helping me set up.

Friday afternoon parties are becoming my favourite.
I find Saturday parties harder to clean for and organise with everyone home 'helping' or messing.
They seem to take ALL day and the party always goes overtime (which is ok, but still)
Friday parties from 3:30 till 5:30pm everyone is always gone by 6 latest and its done.
Kids spend the preparty time hyper at school and not at home underfoot.
I set this party up Thursday night as I had work Friday.
Anyway it seemed a lot easy than a Saturday party. And that's my party tip.
I feel silly sharing our parties sometimes as they are pretty simple but I like real parties with realistic price tags (I have about $100 - 150  budget per party) and even though I love and get many of my ideas from party blogs most are done in a studio and are ideas to share online, not at real parties.

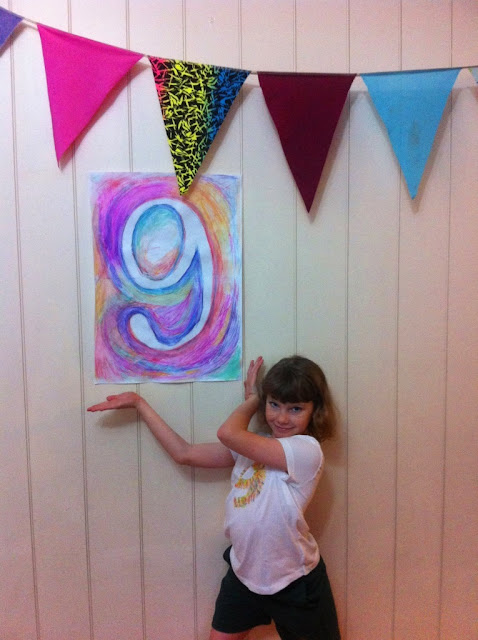
and an art party is the perfect place to wear your arty number birthday shirt.



Monday, June 22, 2015

Winter Solstice 2015

 
As per tradition ~ a little Solstice celebration.
 
This time we had hot chocolates in hand to watch the sunset.
Sadly the sun was hidden by the city. Then the clouds cleared.
We saw the Moon, Venus and Jupiter all in line.
We came home to marshmallows and fire.
 
Happy Longest Night of the year.


Its pretty crazy that its mid winter and we were doing this on Saturday and a few even swam.


Previous Solstice Celebrations Here: 
 

Saturday, June 13, 2015

Fabric Marker {Number Birthday Shirts}


I saw this idea this week for a Personalised Letter Shirt and thought perfect for our birthday shirts.

Which is lucky as I was just thinking this week I need to get onto that.

There are birthdays coming up!

And how lucky that we could use the same stencil. We have a 9 and 6 year old!


Buy a plain white Tshirt.

Print out a number

Use a Stanley knife to cut out the number.

Stick Stencil onto shirt

Use fabric markers to decorate


I didn't have any contact but laying a piece over the hole and then cutting the number out leaving a small border so it will stick onto your shirt would be perfect. I used sticky tape to create a little sticky border to help it stick on the tshirt, as I knew the kids wouldn't be able to keep the stencil on the shirt without moving. We also used double sided tape to stick down the circle in the middle of the 9/6

We placed a piece of cardboard between the layers of the shirt so it didn't bleed through and to give a hard surface to draw on.

Using Fabric markers (our local store was sold out of felt markers, so we had to use fabric crayons) draw lines all over the stencil. Our tshirt stretched a bit - catching on the crayons. I helped by keeping the tshirt firm in place.

When you lift off the stencil you should have a lovely number left behind.


When I said I wanted to photograph them the girls went and styled themselves like this:


Previous Birthday Shirt Ideas:


Paint Stencilled Birthday Shirt

Letters {ONE} Birthday Shirt

Felt and Fabric Birthday Shirt

Ribbon Birthday Shirt

Reverse Applique Birthday Shirt

Zig Zag Stitched Birthday Shirt 

Spotty Reverse Applique

2 Birthday Shirt

Recycled Corderoy Pants 5 Birthday Shirt

Felt and Fabric double layer 10 Birthday Shirt

Felt Cat and Reverse Applique 11 Birthday Shirt

Felt Snowflake and Stitched #6 Birthday Shirt

Bleached Out Number Shirt
Related Posts Plugin for WordPress, Blogger...